Information
Collision models in the Schmetterling Engine are usually convex shapes to simplify physics and make collision calculations easier.
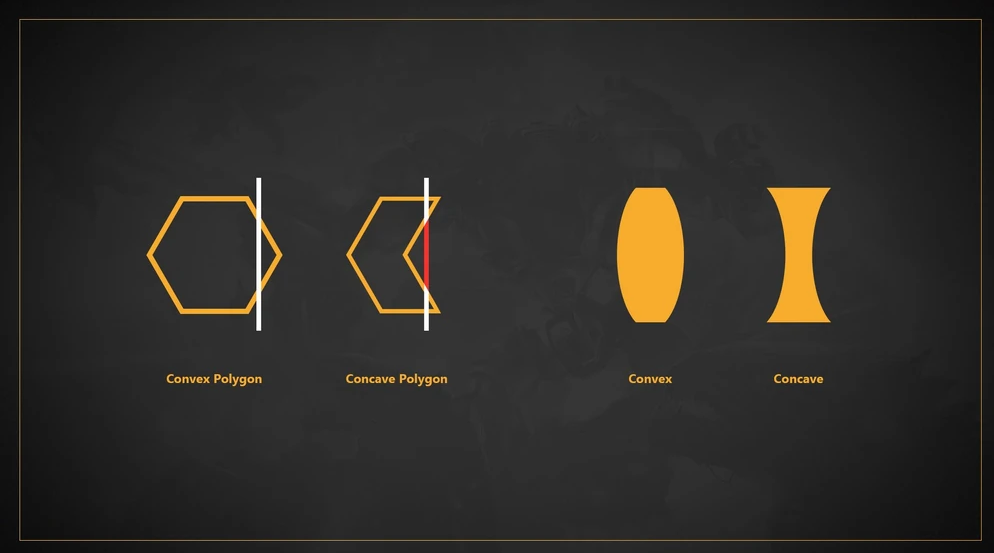
This video explains the difference between the two: https://www.youtube.com/watch?v=NlHqdwTtcCY
Create collision models
Clone your meshes
As the collision box will directly change your mesh, you don’t have any access to the original model. To prepare for that, you have to clone your mesh and then change that clone to be your collision box.
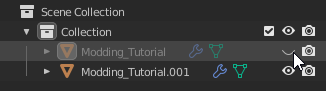
To do so, simply select your mesh and ctrl + c and ctrl + v to copy and paste it again. As a result, you will have the same object twice, just on top of another.

To proceed, disable the view of the original mesh by clicking the eye icon top right, so you won’t see and as such, also won’t touch it.
Naming the collision mesh
Naming the collision mesh is important, since the game requires a certain naming pattern to detect a collision box mesh. You do that by adding a _cX suffix to the name like this: test_rock_01_cX, where X is the number of the collision convex. The first collision for that object gets the _c1 suffix, the second _c2, and so on. What is essential - collision naming for each model starts from c1 and goes up!
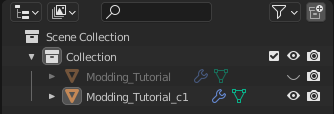
To change your collision box name, select the meshes and either change the bottom textbox, or select it in the top list and press F2 to rename it.
Create the collision mesh
As the final step, you now actually modify your cloned mesh to be your collision mesh.
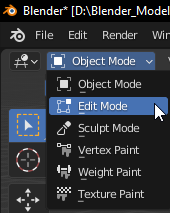
Select your cloned mesh, enter the Blender edit mode (press tab or click top left on the drop-down menu)
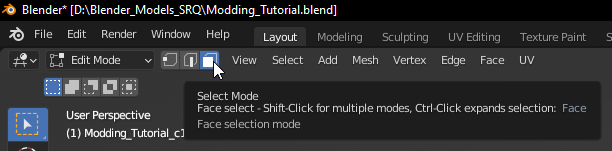
and select every face (face = “side”) of your model. It helps to switch to the face selection by clicking on the corresponding button top left.
Now select every face you have on your model where the collision box should be available. This is easy for simple / basic objects, but becomes more difficult the more angles/sides your object has.
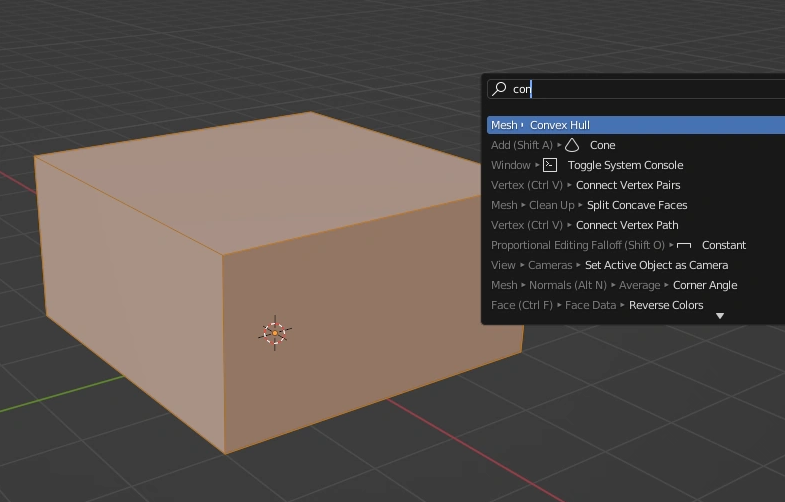
Once everything is selected, open your search bar (F3 or space, depending on your settings) and search for the option Mesh > Convex Hull and click it.
It doesn’t have to be very precise - some clipping is perfectly fine, and the simpler the shape of your collision, the better.
For basic shapes like above, you probably won’t even see if something happened.
Final check
- To prepare for mesh export, make sure you re-enable all the meshes on your project, click on every closed eye to make the mesh visible again.

- Make sure you renamed every collision mesh to have a
_cXsuffix, like it was written in a section before. - The location of the collision box should be the same as your original mesh ( 0 : 0 : 0 )
Common errors
- Wrong name of the collision mesh
- Moved the collision box mesh to another spot
External source
https://store.steampowered.com/news/app/780310/view/5375631932961299786