Information
To create an animation, you use the mesh you already created and make it do something.
Configuring the workspace
Important
You need to have at least 1 root bone before you add the “real” animation bone if you want to create an animation.
Example: A simple moving part going up + down could be made with 1 bone, but the game still requires a “root” bone somewhere. Otherwise, it will use your animation bone and thus your whole animation won’t work correctly.
Required settings
For the animation to work, EXOR does have some requirements.
First, open up the animation menu at the top of the screen:

In here, switch to the “Action Editor” at the left of the screen:

Click on “New” above the timeline:
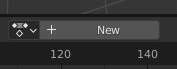
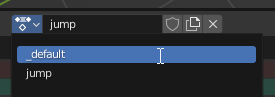
and give it the name _default.
IT HAS TO BE THIS NAME

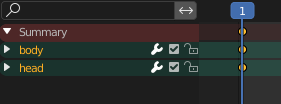
In here, we have to keyframe the default / 0 position, so what the model looks like not doing anything.
Select all your bones and press “ i “ to bring up the keyframe menu. Select Location, Rotation and Scale (this depends on how complex your model is)

Now your timeline will feature your bones and their starting position with a keyframe.
Create an animation
Create a new action
Now that the requirements are done, a real animation needs to happen.
Start by pressing the “new action” button and give a fitting name to the new action.


Create the animation
Select the bone which should be the actor of the animation and move the timeline slider where a part of the action should happen.
Then do something with the bone object - rotate it, move it, scale it etc. Everything you do here is in pose mode and as such, hotkeys for those things are required (like “ G “ to move the bone) otherwise you move the whole mesh.

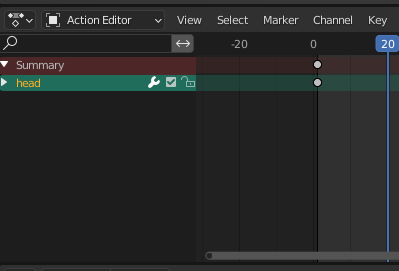
Once you are done with this first change, press “ i “ again and select Available.
In this example, I moved the head bone further up.
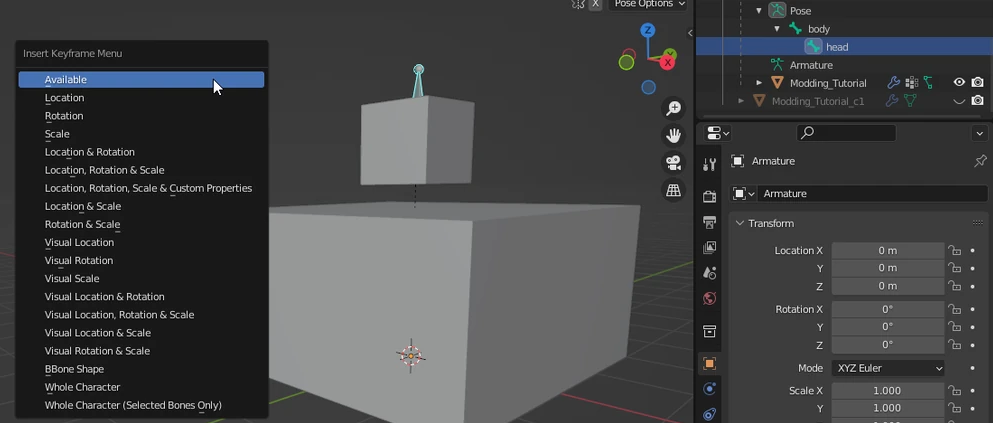
Now the bone got a new keyframe for this location which can be seen in the timeline.

If you want a repeating animation, end the timeline with the same position/rotation/etc what you had for the first keyframe. For this example, I bring the head bone back on top of the bigger box and add a keyframe.
Like that it starts on the box, jumps up and comes down again.

Change the animation frame rate
Usually Blender has a default frame rate of 24fps, to change that, open the “Output Properties” side menu and change the FPS to 30. The Riftbreaker has a 30 fps animation speed.

The Export
Prepare for export
When everything is animated, switch back to the default action
Export
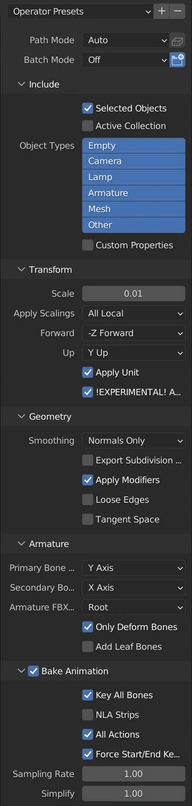
In object mode, select everything (press “ A “ as the hotkey), then open the EXOR exporter plugin and use these export properties: