Information
Sometimes you need to create multiple bones which are in hierarchy so the game can use that functionality.
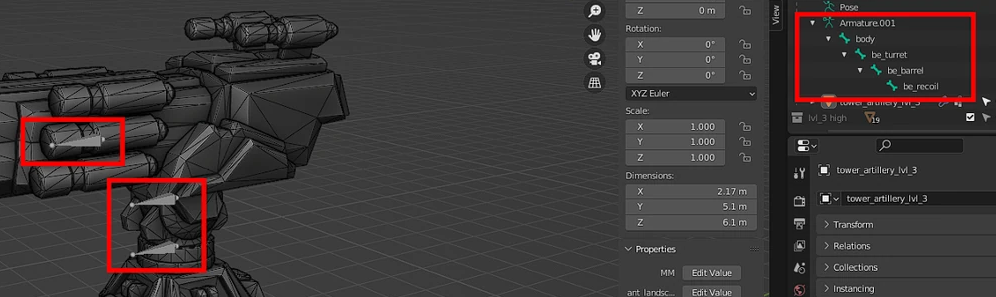
Example: A defensive tower with a barrel, the recoil, the tower head etc.
So that everything together can be moved just as the game needs it to aim for enemies.
Bone creation
Create multiple bones
To create a hierarchy, you need to have more than just one bone. So to start things off, we have a simple Blender greybox with another smaller grey box on top, both are joined together and at the bottom of the model is a single bone.

Now to add another bone, select the bone you already have and in edit mode, press “SHIFT + D” this duplicates the bone, so it’s using the same armature as the original bone.
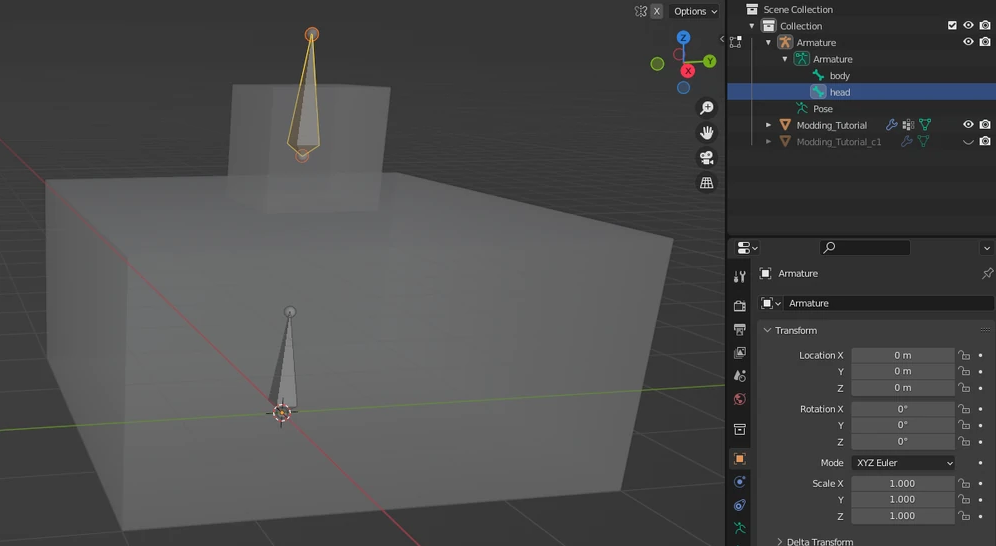
After you pressed that button, you automatically have the new bone grabbed and can drag it wherever you want for now - in this example, I place it inside the smaller box and renamed both bones to have a more fitting name.
Create the bone hierarchy
Now that there is more than one bone, we can create the hierarchy. To do so, be in edit mode and select both of your bones.
Important: Depending on which bone you select last, it will become the parent. So whatever bone you select first, that bone will become the child and the last selected bone will become the parent.
In my example, I want the head to be a child of the body, so I select the head first and then the body.
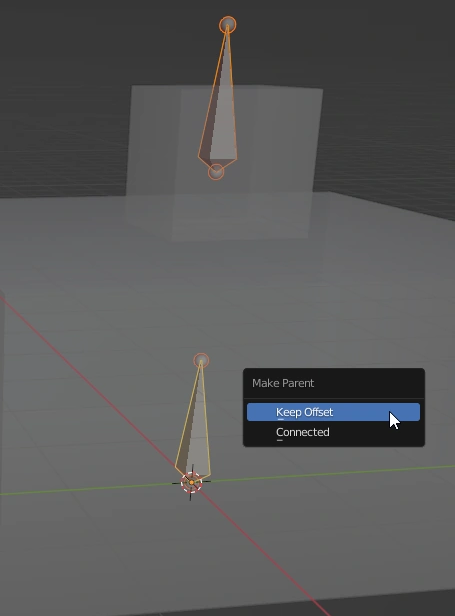
Once every bone is selected, press “CTRL + P” to pring up the parent menu. In here, select Keep Offset
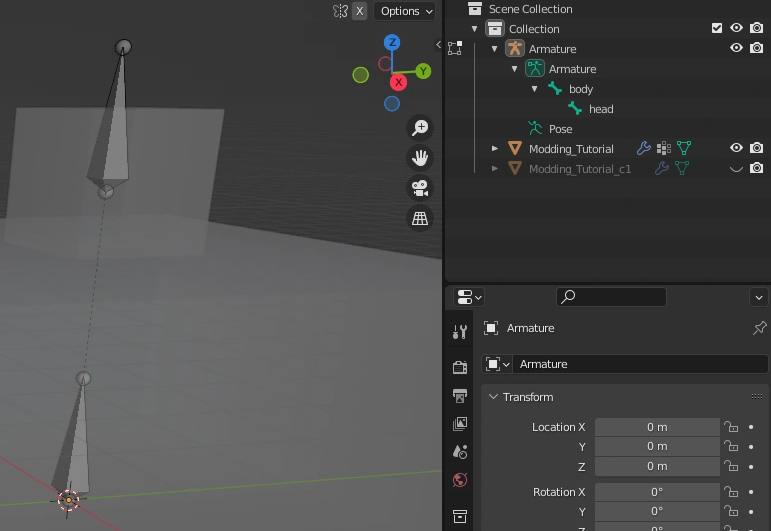
Afterwards you will see a line showing the bone connection as well as the bone hierarchy in the collection.
Connect the mesh to the bone
Even though we have more than one bone now, you only connect your mesh to one “root” bone of the mesh, since every other bone is connected to another bone, not depending on a mesh.
Important: Besides what is written above, does the EXOR Blender exporter not even support more than 1 root bone connected to the mesh currently.
To connect the bone to the mesh, you need to make it a parent.
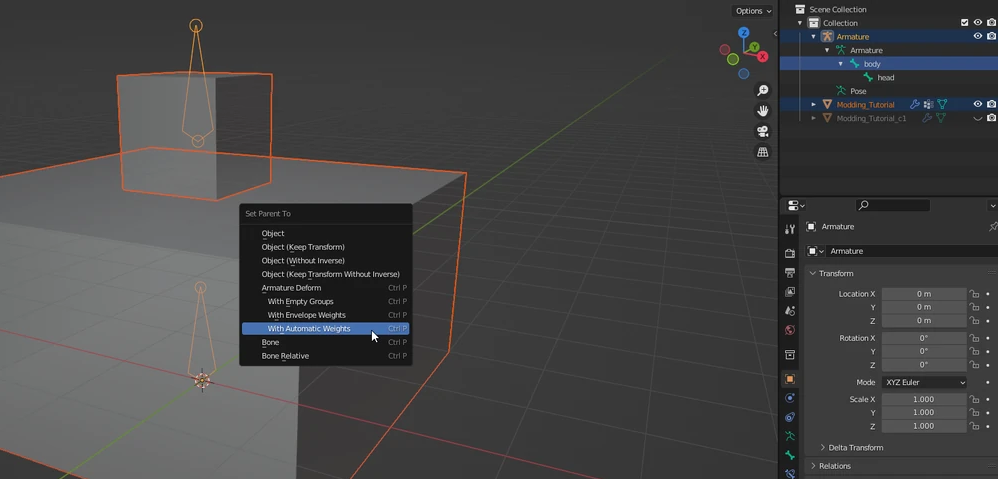
To do so, switch to object mode and select the mesh you want to connect with the bone, then select the bone. Once you have both selected, press CTRL + P and select Armature Deform > With Automatic Weights
If you have trouble clicking the bone, select it from the collection.
Now, the connection logic is: The mesh is connected to the root bone, which is connected to the next child bone.
(Optional) Weight paint
Depending on the complexity of your mesh, you can now configure the weight you gave to your bones, since the automatic weight added vertices to your bone vertex groups automatically.
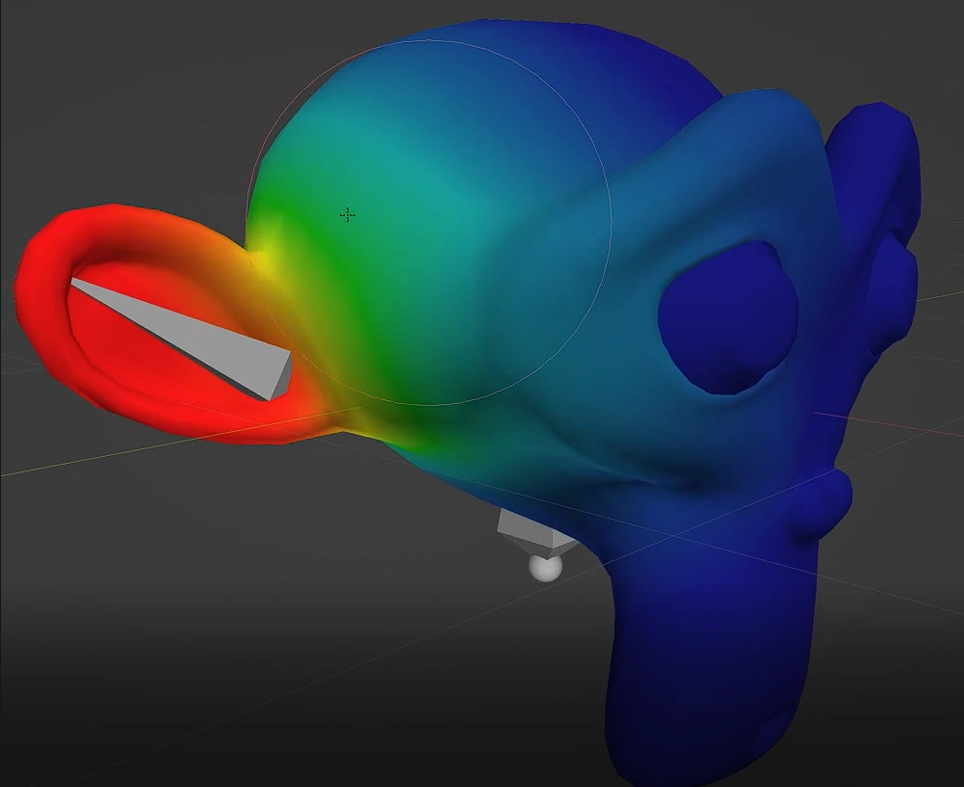
First, select your mesh in object mode and then switch to the weight paint mode top left.

With the tools on the side, you can change the weight of the mesh in connection to your bone now and more important: See it. Helps while with more complex meshes and bones.
Like a bone in an ear where just the ear and a bit of the head should move, not everything.
Important: Just like in the first part of the bone/skeleton tutorial, check for your vertices in edit mode and that every vertex is connected to some vertex group.
Common errors
- Not all vertices connected to some bone
- Used wrong mode (object, edit, …)